
今回の記事では、マルチモーダルAIを用いた画像検索について解説します。本記事では、マルチモーダルAIを使って料理のレシピ画像を検索する検証を行ってみます。
目次
- 1.はじめに
- 2.マルチモーダルAIを使った画像検索
- 3.Siglipについて
- 4.検証で使用する画像と検証に使用したPCスペックについて
- 5.画像検索デモアプリの実装
- 6.siglipによる画像検索の精度検証
- 7.siglip2による画像検索の精度検証
- 8.補足:Azureのマルチモーダル埋め込みによる画像検索の精度検証
- 9.終わりに
1.はじめに
マルチモーダルAIとは、テキスト、画像、音声など異なる種類を扱うAIのことです。 具体的なマルチモーダルAIの種類については、過去のオブジェクトの広場の記事「複数モダリティを使う「マルチモーダルAI」の紹介 第1回 DETR+RoBERTaを使ったマルチモーダル推論モデル「MDETR」の紹介とColabでの推論」で詳しく紹介されています。 そこから引用すると、マルチモーダルAIの種類は下記の5種類に分類することができます。
①Representation (表現)
マルチモーダルのデータをどのように表現したり要約するかについて解決するタスク。
(例) テキスト情報と音声信号データを同一空間で扱えるか、など。②Translation (変換)
あるモダリティのデータを別のモダリティのデータに変換するタスク。
(例) 画像から説明文を生成する、など。③Alignment (アライメント)
複数のモダリティ間の直接的な関係を明らかにするタスク。
(例) 料理を作る動画の各シーンを正確に並び替えるためにレシピ情報(テキスト)と画像中の情報を結びつける、など。④Fusion (融合)
ある予測をするために複数のモダリティの情報を利用するタスク。
(例) スピーチ内容を正確に予測するためにスピーチ音声と話者の口の動き(動画)を使う、など。⑤Co-learning (共学習)
あるモダリティ内で作られた推論モデルやベクトル表現などを別のモダリティに転移させるタスク。
(例) Zero-shot learningなど。
今回は①のRepresentationに該当するマルチモーダルAIの埋め込み表現の手法を使用します。 マルチモーダルAIの埋め込み表現とは、テキストや音声、画像といった異なる種類のデータを同じ空間に表現する手法です。 これにより、本来画像やテキストといった異なる性質を持つために比較ができないデータ同士を比較できるようになります。
本記事ではマルチモーダルAIのモデルであるSiglipモデルによって、与えられたキーワードにマッチする画像を検索する方法を解説します。 まず、与えられたキーワードにマッチする画像を検索するデモアプリの実装を紹介し、その次に簡単な画像検索の検証を行います。 また、最近登場したSiglipモデルの進化系であるSiglip2モデルについてもご紹介します。最後にクラウドのマルチモーダルAIサービスであるAzureのマルチモーダル埋め込みを使った検証も行います。
2.マルチモーダルAIを使った画像検索
画像検索(Image retrieval)とは与えられた画像やテキストを元に関連する画像を検索する手法のことです。 マルチモーダルAIの埋め込み表現を用いた画像検索とは、埋め込み表現により画像と画像同士の類似性や画像とテキスト同士の類似性を求めることによって、関連する画像を検索する手法になります。 これによって、与えられたキーワードにマッチする画像や与えられた画像と似ている画像を検索することが可能になります。
具体的には、下記の図のようにテキストや画像をベクトルに変換(埋め込み)し、同じ空間で比較することによって、画像とテキストの類似度を算出します。 その次に類似度が高い順に指定された順位分の画像を抽出して、画像検索を行います。類似度算出にはコサイン類似度を用います。

埋め込み表現を使って、キーワードから画像を検索する方法としては、ローカルで使えるマルチモーダルAIモデルを使用する方法、クラウドのAIサービスを使用する方法の二つが存在します。 後者のクラウドのAIサービスでは、AWSのTitan Multimodal Embeddings G1、GCPのGenerative AI on Vertex AIのmultimodal-embeddingsなどが存在しますが、こちらは英語しか対応していないようです。
また、Azureから出ている Computer Vision のImage Retrieval1は日本語に対応しているようですが、本記事で検証した結果、日本語の精度はいまいちでした。この結果は補足で説明しますが、外部記事にも似たような事象が報告されているようです。2 したがって、今回はローカルで使えるマルチモーダルAIモデルであるsiglipを使って検証を行っていきます。
3.Siglipについて
Siglip3はGoogle DeepMindが開発したclipモデルの派生形のモデルであり、clipモデルの損失関数をSoftmax関数からSigmoid関数に変更したモデルになっています。 clipモデルの詳細については、過去のオブジェクトの広場の記事「はじめての自然言語処理 第19回 文章ベクトル化モデルと ResNet50 で CLIP 風のモデルを作る」で触れられているので、詳細はこちらをご覧ください。
Siglipのモデルとしては、WebLi4の画像を256x256の解像度で事前に学習されたsiglip-base-patch16-256-multilingual5を使用します。 WebLI (Web Language Image) とはWeb上から収集した画像と多言語のテキストのペアのデータセットです。
具体的なデータ例は下記のようになります。

Siglipの学習はclipモデルと同様に対照学習(Contrastive pre-training)を用いています。 対照学習(Contrastive pre-training)とは、テキストと画像をTextEncoder,ImageEncoderで埋め込み表現にし、テキストと画像のコサイン類似度を対応する画像とテキストのペアに対して最大化するように学習をする手法のことです。 「はじめての自然言語処理 第19回 文章ベクトル化モデルと ResNet50 で CLIP 風のモデルを作る」でも触れられているので、そちらもご参照ください。
下記の図のように、(画像, テキスト) のペアをバッチサイズ N とすると、T1~TN がテキストのTextEncoderによる埋め込み表現、I1~IN が画像のImage Encoderによる埋め込み表現をそれぞれ表しています。
それらに基づき、コサイン類似度を算出します。

siglip-base-patch16-256-multilingualは多言語のデータで学習させたモデルなので、日本語の検索も英語の検索も両方とも可能になっています。
Siglipの利点は、CPUだけの推論でも十分な速度で動作することです。
4.検証で使用する画像と検証に使用したPCスペックについて
使用データとしては、弊社で2025年7月31日まで運営されていたレシピサイト「ボブとアンジー(現在は閉鎖済み)に使用されているレシピ画像を使用します。 レシピ画像は200枚を使用します。実際のレシピ画像の一例は下記の図をご参照ください。

また本記事では、下記のスペックのPCを用いて、検証を行っています。
CPU :Intel® Xeon® Platinum 8370C CPU @ 2.80GHz 2.79 GHz
メモリ:32.0GB
OS : Windows 11 Enterprise
5.画像検索デモアプリの実装
ここでは、実際に画像検索を行うデモアプリの実装を行っていきます。 デモアプリの実装にはgradioを使用します。 gradioとは機械学習向けのWebアプリを容易に構築するオープンソースのライブラリです。 gradioの使い方としては、npakaさんの解説記事のシリーズが非常に分かりやすかったので、そちらをご参照ください。6789
まず最初に、動作に必要な各種ライブラリをインストールします。
pip install ftfy
pip install gradio
pip install huggingface-hub
pip install torch
pip install torchvision
pip install transformers
pip install sentencepiece
pip install protobuf
次にsiglipモデルによって、検証に使用する画像データを埋め込み表現に変換し、それをJSON形式で保存します。 ここで、使用するレシピ画像はフォルダ名recipe_imgのフォルダに収納されているとし、実装コードのファイル名はImage_register_siglip.pyとしています。
Image_register_siglip.py
import os, glob, json, torch
from tqdm import tqdm
from PIL import Image
from transformers import AutoModel, AutoImageProcessor

ckpt ="google/siglip-base-patch16-256-multilingual"
# モデルとプロセッサーの準備
# プロセッサー : input(画像や文字)をモデルが受け入れる形式に変換。
model = AutoModel.from_pretrained(
    ckpt,
    trust_remote_code=True,
).to("cpu")
processor = AutoImageProcessor.from_pretrained(
    ckpt,
    use_fast=True
)

# フォルダ内の画像ファイルのフルパス取得(サブフォルダ含む)
def get_image_paths(root_dir):
    # 画像ファイルの拡張子に基づくパターンを指定
    patterns = ['*.png', '*.jpg', '*.jpeg', '*.gif', '*.bmp']
    image_paths = []
    for pattern in patterns:
        # 指定したパターンでファイルを検索
        search_pattern = os.path.join(root_dir, '**', pattern)
        image_paths.extend(glob.glob(search_pattern, recursive=True))
    return image_paths
# フォルダ内の画像を全てprocessorでembeddingに変換
image_features = []
#レシピ画像が収納されたディレクトリパスをimage_dirに指定
image_dir = 'recipe_img'
output_json_filepath = image_dir+'_siglip.json'

image_paths = get_image_paths(image_dir)
for image in tqdm(image_paths, desc='Convert Embedding'):
  #各画像の埋め込み表現を取得
    filename = os.path.basename(image)
    try:
        pil_img = Image.open(image)
        pil_img = processor(images=pil_img, return_tensors='pt').to('cpu')
        with torch.no_grad():
            embedding = model.get_image_features(**pil_img)    # 画像埋め込み
            embedding = embedding / embedding.norm(dim=-1, keepdim=True)    # 正規化
            image_features.append({'embedding': embedding,
                                  'filename': filename,
                                 'filepath': image})
    except:
        print('error: ' + filename)
        continue
# image_featuresを文字列に変換
image_features_json = []
for image_feat in image_features:
    image_features_json.append({'embedding': image_feat['embedding'].tolist(),
                               'filename': image_feat['filename'],
                               'filepath': image_feat['filepath']})
# image_features(画像の埋め込み表現)をJSONに保存
json_filepath = output_json_filepath
with open(json_filepath, 'w', encoding='utf-8') as f:
    json.dump(image_features_json, f, indent=4)
最後にデモアプリ側を実装します。
デモアプリでは、検索キーワードを入力すると、その検索キーワードを埋め込み表現に変換し、画像データとの埋め込み表現との類似度を算出します。その類似度の高い順に画像を表示することで、検索キーワードにマッチする画像を表示することができます。
デモアプリのソースコードImage_search_siglip.pyは下記の通りとなります。
Image_search_siglip.py
import os
import json
import gradio as gr
import torch
from transformers import AutoModel, AutoImageProcessor, AutoProcessor
import ftfy
import html
import re

#レシピ画像が収納されたディレクトリパスをimage_dirに指定
image_path='recipe_img'
json_filepath = image_path+'_siglip.json'
ckpt ="google/siglip-base-patch16-256-multilingual"

#先ほど保存したレシピ画像の埋め込み表現のjsonファイルを読み込み
with open(json_filepath, 'r', encoding='utf-8') as f:
    image_features_json = json.load(f)

# モデルとプロセッサーの準備
# プロセッサー : input(画像や文字)をモデルが受け入れる形式に変換。
model = AutoModel.from_pretrained(
    ckpt,
    trust_remote_code=True,
).to("cpu")
processor = AutoImageProcessor.from_pretrained(
    ckpt,
    use_fast=True
)
disp_processor = AutoProcessor.from_pretrained(
    ckpt,
    use_fast=True
)
# テキストの文字化けやエンコーディング修正
def basic_clean(text):
    text = ftfy.fix_text(text)
    text = html.unescape(html.unescape(text))
    return text.strip()

# テキスト内の空白文字を半角スペースに置き換え、前後の空白文字削除
def whitespace_clean(text):
    text = re.sub(r"\s+", " ", text)
    text = text.strip()
    return text

# テキストのトークン化とPytorchのテンソル形式に変換
def text_processor(text):
    text = whitespace_clean(basic_clean(text))
    inputs = disp_processor(text, return_tensors="pt", padding="max_length", truncation=True, max_length=64).to("cpu")
    with torch.no_grad():
        embedding = model.get_text_features(**inputs)
        embedding = embedding / embedding.norm(dim=-1, keepdim=True)
    return embedding

# image_features_jsonをimage_featuresに変換
image_features = []
for image_feat in image_features_json:
    image_features.append({'embedding': torch.tensor(image_feat['embedding']).to('cpu'),
                           'filename': image_feat['filename'],
                           'filepath': image_feat['filepath']})

# 類似画像検索
def clip_results(query: str,k :int):
    text_embedding = text_processor(query)

    # 画像の特徴量とテキストの特徴量の間のコサイン類似度を計算
    cos_similarities = torch.stack([torch.nn.functional.cosine_similarity(text_embedding, img_feat['embedding'], dim=-1) for img_feat in image_features]).squeeze()
    # cos_similaritiesが空でないことを確認
    if len(cos_similarities) == 0:
        return []

    top_k = min(k, len(cos_similarities))
    try:
        top_sim_indices = cos_similarities.topk(top_k, largest=True).indices
        selected_images = [image_features[idx]['filepath'] for idx in top_sim_indices]

        print(selected_images)
        print(max(cos_similarities))

        print('---------')
    except RuntimeError as e:
        print('Runtime error occurred:', e)
        return []

    return selected_images

with gr.Blocks() as demo:

    with gr.Tab("画像検索アプリ"):
        gr.Interface(fn=clip_results,inputs=[gr.Textbox(label="検索キーワード"),gr.Slider(1,10,step=1,label="上位何件表示")],outputs=gr.Gallery(label='images',height =1880))
#portにwebアプリのポート番号を入力する
demo.launch(share=True,server_port=7001)
ここで簡単にgradio部分の解説をします。以下の箇所ではwith gr.Tabで「画像検索アプリ」という名前のタブを作成しています。
with gr.Tab("画像検索アプリ"):
次に、以下の箇所では、gr.Interfaceの引数のfn,inputs,outputsに画像の検索結果を返すclip_resultsの関数、検索キーワードを入力するgr.Textbox、UI側にclip_resultsで返ってきた複数の画像を表示するgr.Galleryをそれぞれ指定しています。
gr.Interface(fn=clip_results,inputs=[gr.Textbox(label="検索キーワード"),gr.Slider(1,10,step=1,label="上位何件表示")],outputs=gr.Gallery(label='images',height =1880))
Image_search_siglip.pyを実行すると下記のメッセージが表示されます。
* Running on local URL: http://127.0.0.1:7001
Running on local URL:の左に記載されているURLにブラウザでアクセスすると、下記のようにデモのwebアプリの画面が表示されます。

このデモアプリの使い方を説明します。
① 検索キーワードの欄に検索したいキーワードを入れます。
②「上位何件表示」の文字の下にあるスライドバーに検索で表示したい件数を指定します。(例えば、3件の検索結果を表示したい場合は、3を指定します。)
③ 最後に「Submit」をクリックすると、検索キーワードに関連する画像が②で指定した数値分表示されます。
例えば、検索キーワードの欄に「主食」と入力し、上位何件表示のスライドバーに4を指定して、「Submit」をクリックすると主食に関連する画像が4件表示されます。
下図を見ていただければ分かる通り、実際出てくる画像も主食に分類される料理の画像がヒットしていることがわかります。

6.siglipによる画像検索の精度検証
最後に画像検索の精度がどのくらいあるか検証します。
精度は以下のように定義します。
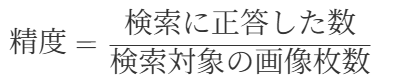
ここで検索の正答の算出方法は以下の通りとなります。
① 検索キーワードを用いて画像検索を行い、上位k件を取得する
② 検索キーワードが上位k位以内でヒットした画像の元レシピのテキストが含まれていたら正答にする
元レシピのテキストはボブとアンジーのサイトからスクレイピングを行って取得しています。例えば、検索キーワードが「鮭」であり、レシピ画像が下記のレシピサイトに記載されているものが対象であるとします。
その場合、下記の画像のように、元レシピのテキストに「鮭」という単語が含まれているので、正答とします。

また、検索キーワードは50種類とし、検索キーワードはsearch_word.csvに収納されているとします。 search_word.csvの内容のイメージとしては下記の表のようになります。

ここで上位k位を1,3,5にして検証してみます。 検証用のコードevaluation_siglip.pyは下記の通りとなります。
evaluation_siglip.py
import glob
import pandas as pd
import os
import glob
import json
import pandas as pd
import torch
from transformers import AutoModel, AutoImageProcessor, AutoProcessor
import ftfy
import html
import re
image_path = "recipe_img"
json_filepath = image_path+'_siglip.json'
with open(json_filepath, 'r', encoding='utf-8') as f:
    image_features_json = json.load(f)

# モデルとプロセッサーの準備
# プロセッサー : input(画像や文字)をモデルが受け入れる形式に変換。
model = AutoModel.from_pretrained(
    "google/siglip-base-patch16-256-multilingual",
    trust_remote_code=True,
).to("cpu")
processor = AutoImageProcessor.from_pretrained(
    "google/siglip-base-patch16-256-multilingual"
)
disp_processor = AutoProcessor.from_pretrained(
    "google/siglip-base-patch16-256-multilingual"
)
# テキストの文字化けやエンコーディング修正
def basic_clean(text):
    text = ftfy.fix_text(text)
    text = html.unescape(html.unescape(text))
    return text.strip()

# テキスト内の空白文字を半角スペースに置き換え、前後の空白文字削除
def whitespace_clean(text):
    text = re.sub(r"\s+", " ", text)
    text = text.strip()
    return text

# テキストのトークン化とPytorchのテンソル形式に変換
def text_processor(text):
    text = whitespace_clean(basic_clean(text))
    inputs = disp_processor(text, return_tensors="pt", padding="max_length", truncation=True, max_length=64).to("cpu")
    with torch.no_grad():
        embedding = model.get_text_features(**inputs)
        embedding = embedding / embedding.norm(dim=-1, keepdim=True)
    return embedding

# image_features_jsonをimage_featuresに変換
image_features = []
for image_feat in image_features_json:
    image_features.append({'embedding': torch.tensor(image_feat['embedding']).to('cpu'),
                           'filename': image_feat['filename'],
                           'filepath': image_feat['filepath']})

def clip_results(query: str,k :int):
    text_embedding = text_processor(query)

    # 画像の特徴量とテキストの特徴量の間のコサイン類似度を計算
    cos_similarities = torch.stack([torch.nn.functional.cosine_similarity(text_embedding, img_feat['embedding'], dim=-1) for img_feat in image_features]).squeeze()
    # cos_similaritiesが空でないことを確認
    if len(cos_similarities) == 0:
        return []

    top_k = min(k, len(cos_similarities))
    try:
        top_sim_indices = cos_similarities.topk(top_k, largest=True).indices
        selected_images = [image_features[idx]['filepath'] for idx in top_sim_indices]
        return selected_images

    except RuntimeError as e:
        print('Runtime error occurred:', e)
        return []


download_folder = image_path
file_list=glob.glob("*/*.txt")
with open('search_word.csv', 'r', encoding="shift-jis") as file:
    search_words = file.readlines()
    search_words = [search_word.strip() for search_word in search_words]  # 改行を削除

# 指定したk位に対応する評価結果を算出
def evalution (search_words,k):

    search_word_list = []
    hit_word_list = []
    for word in search_words:
        result = clip_results(word,k)
        search_word_list.append(word)
        for r in result:
            correct = 0
            text =r.replace("jpg","txt")
            print(text)
            with open(text, mode='r') as f:
                recipe = f.read()
                if word in recipe:
                    correct = 1
                    break
                else:
                    correct = 0

        hit_word_list.append(correct)
    print(len(search_word_list))
    print(sum(hit_word_list))
    df = pd.DataFrame({"search_word":search_word_list,"hit_word":hit_word_list,"accuracy":sum(hit_word_list)/len(search_word_list)})
    #結果をcsvファイルに保存
    df.to_csv("test_"+str(k)+".csv")
    return df

evalution (search_words,1)
evalution (search_words,3)
evalution (search_words,5)
evaluation.pyを実行すると、次図のように上位1位以内、上位3位以内、上位5位以内にヒットした画像の正答率を保存したcsvファイルが出力されます。各結果の正答率は下記のようになります。

これを見ると、上位1位以内の精度はそこまで高くありませんが、上位3位以内、上位5位以内になると、ある程度の精度が担保されていることがわかります。
7.siglip2による画像検索の精度検証
ここまで、siglipについて紹介しました。
最近ではこのsiglipを改良したsiglip210がGoogle DeepMindから登場しました。そこで、ここでは軽くsiglip2の紹介を行い、精度の検証も進めていきたいと思います。
siglip2の特徴としては、下記の図のようにsiglipの損失関数にLocCa11,self-distillation, masked predictionという仕組みを取り入れて事前学習を行っているという点です。

LocCaとは、簡単に言うと、学習タスクにReferring Expressions(参照表現)でのタスクとGrounded Captioningの二つを加える仕組みとなっています。
具体的には、前者のReferring Expressionsのタスクは、画像のキャプションが記述されたバウンディングボックスの座標の予測を行うタスクであり、後者のGrounded Captioningのタスクは、与えられたバウンディングボックスの座標を元に、その座標内の画像のキャプションを予測するタスクです。
self-distillationとは、簡単にいうと、ネットワーク層の浅い層の分類器を深い層の分類器の出力を使って学習させる手法です。
self-distillationについてはいくつかの記事が分かりやすく解説されているので、詳しくはそちらをご覧ください。1213
最後にmasked predictionとは学習に使う画像データをマスク処理したものを学習データに追加して学習に使う手法です。
ここで、今までの結果をWebliで学習させたsiglip2モデルであるgoogle/siglip2-large-patch16-51214で検証してみましょう。コードを記載しますが、基本的に読み込むモデル名とアウトプットファイルのファイル名を変更しただけです。
まずsiglipモデルの時と同様にsiglip2で、検証に使用する画像データを埋め込み表現に変換し、それをJSON形式で保存します。
実装コードのファイル名はImage_register_siglip2.pyとしています。
Image_register_siglip2.py
import os, glob, json, torch
from tqdm import tqdm
from PIL import Image
from transformers import AutoModel, AutoImageProcessor
ckpt = "google/siglip2-large-patch16-512"
# モデルとプロセッサーの準備
# プロセッサー : input(画像や文字)をモデルが受け入れる形式に変換。
model = AutoModel.from_pretrained(
    ckpt,
    trust_remote_code=True,
).to("cpu")
processor = AutoImageProcessor.from_pretrained(
    ckpt,
    use_fast=True
)

# フォルダ内の画像ファイルのフルパス取得(サブフォルダ含む)
def get_image_paths(root_dir):
    # 画像ファイルの拡張子に基づくパターンを指定
    patterns = ['*.png', '*.jpg', '*.jpeg', '*.gif', '*.bmp']
    image_paths = []
    for pattern in patterns:
        # 指定したパターンでファイルを検索
        search_pattern = os.path.join(root_dir, '**', pattern)
        image_paths.extend(glob.glob(search_pattern, recursive=True))
    return image_paths
# フォルダ内の画像を全てprocessorでembeddingに変換
image_features = []
image_dir = 'recipe_img'
output_json_filepath = image_dir+'_siglip2.json'

image_paths = get_image_paths(image_dir)
for image in tqdm(image_paths, desc='Convert Embedding'):
    filename = os.path.basename(image)
    try:
        pil_img = Image.open(image)
        pil_img = processor(images=pil_img, return_tensors='pt').to('cpu')
        with torch.no_grad():
            embedding = model.get_image_features(**pil_img)    # 画像埋め込み
            embedding = embedding / embedding.norm(dim=-1, keepdim=True)    # 正規化
            image_features.append({'embedding': embedding,
                                  'filename': filename,
                                 'filepath': image})
    except:
        print('error: ' + filename)
        continue
# image_featuresを文字列に変換
image_features_json = []
for image_feat in image_features:
    image_features_json.append({'embedding': image_feat['embedding'].tolist(),
                               'filename': image_feat['filename'],
                               'filepath': image_feat['filepath']})
# image_featuresをJSONに保存
json_filepath = output_json_filepath
with open(json_filepath, 'w', encoding='utf-8') as f:
    json.dump(image_features_json, f, indent=4)
次に検証用のコードになります。精度検証の方法もsiglipの時と同様、精度は以下のように定義します。
同じように検索の正答は以下のように定義します。
① 検索キーワードを用いて画像検索を行い、上位k件を取得する
② 検索キーワードが上位k位以内でヒットした画像の元レシピのテキストが含まれていたら正答にする
実装コードのファイル名はevaluation_siglip2.pyとしています。
evaluation_siglip2.py
import glob
import pandas as pd
import os
import glob
import json
import pandas as pd
import torch
from transformers import AutoModel, AutoImageProcessor, AutoProcessor
import ftfy
import html
import re
image_path = "recipe_img"
json_filepath = image_path+'_siglip2.json'
with open(json_filepath, 'r', encoding='utf-8') as f:
    image_features_json = json.load(f)

# モデルとプロセッサーの準備
# プロセッサー : input(画像や文字)をモデルが受け入れる形式に変換。
model = AutoModel.from_pretrained(
    "google/siglip2-large-patch16-512",
    trust_remote_code=True,
).to("cpu")
processor = AutoImageProcessor.from_pretrained(
    "google/siglip2-large-patch16-512"
)
disp_processor = AutoProcessor.from_pretrained(
    "google/siglip2-large-patch16-512"
)
# テキストの文字化けやエンコーディング修正

def basic_clean(text):
    text = ftfy.fix_text(text)
    text = html.unescape(html.unescape(text))
    return text.strip()

# テキスト内の空白文字を半角スペースに置き換え、前後の空白文字削除
def whitespace_clean(text):
    text = re.sub(r"\s+", " ", text)
    text = text.strip()
    return text

# テキストのトークン化とPytorchのテンソル形式に変換
def text_processor(text):
    text = whitespace_clean(basic_clean(text))
    inputs = disp_processor(text, return_tensors="pt", padding="max_length", truncation=True, max_length=64).to("cpu")
    with torch.no_grad():
        embedding = model.get_text_features(**inputs)
        embedding = embedding / embedding.norm(dim=-1, keepdim=True)
    return embedding

# image_features_jsonをimage_featuresに変換
image_features = []
for image_feat in image_features_json:
    image_features.append({'embedding': torch.tensor(image_feat['embedding']).to('cpu'),
                           'filename': image_feat['filename'],
                           'filepath': image_feat['filepath']})

def clip_results(query: str,k :int):
    text_embedding = text_processor(query)

    # 画像の特徴量とテキストの特徴量の間のコサイン類似度を計算
    cos_similarities = torch.stack([torch.nn.functional.cosine_similarity(text_embedding, img_feat['embedding'], dim=-1) for img_feat in image_features]).squeeze()
    # cos_similaritiesが空でないことを確認
    if len(cos_similarities) == 0:
        return []

    top_k = min(k, len(cos_similarities))
    try:
        top_sim_indices = cos_similarities.topk(top_k, largest=True).indices
        selected_images = [image_features[idx]['filepath'] for idx in top_sim_indices]
        return selected_images

    except RuntimeError as e:
        print('Runtime error occurred:', e)
        return []


download_folder = image_path
file_list=glob.glob("*/*.txt")
#検索キーワードをファイルから読み込む
with open('search_word.csv', 'r', encoding="shift-jis") as file:
    search_words = file.readlines()
    search_words = [search_word.strip() for search_word in search_words]  # 改行を削除

# 指定したk位に対応する評価結果を算出
def evalution (search_words,k):

    search_word_list = []
    hit_word_list = []
    for word in search_words:
        result = clip_results(word,k)
        search_word_list.append(word)
        for r in result:
            correct = 0
            text =r.replace("jpg","txt")
            print(text)
            with open(text, mode='r') as f:
                recipe = f.read()
                if word in recipe:
                    correct = 1
                    break
                else:
                    correct = 0

        hit_word_list.append(correct)

    print(len(search_word_list))
    print(sum(hit_word_list))
    df = pd.DataFrame({"search_word":search_word_list,"hit_word":hit_word_list,"accuracy":sum(hit_word_list)/len(search_word_list)})
    #結果をcsvファイルに保存
    df.to_csv("siglip2_test_"+str(k)+".csv")
    return df

evalution (search_words,1)
evalution (search_words,3)
evalution (search_words,5)
siglip2の検証結果は下記のようになります。

意外にもsiglip2の精度はsiglipより低くなる結果となってしまいました。 どうしてこのような結果になったのでしょうか?
ここでsiglip2の論文を改めて見返してみると、画像キャプションのベンチマークであるCrossmodal-3600を使って評価した結果が見つかります。
表に記載されているmSigLIPは多言語のデータで学習させたモデルです。(要するに今回siglipの検証で使ったsiglip-base-patch16-256-multilingualのモデルです。)

どうやら日本語の精度だとmSigLIPの方がsiglip2より精度が高いという状態になっています。
ちなみに、siglip2の方がmSigLIPより精度が高かった言語を確認すると、英語、ドイツ語、フランス語などヨーロッパ系の言語が多い傾向があるようです。現状、siglip2を多言語で学習させたモデルはまだないようですが、mSigLIPのようにsiglip2を多言語で学習させたモデルが登場すれば、日本語でもsiglipより精度が高くなることが予想されます。
8.補足:Azureのマルチモーダル埋め込みによる画像検索の精度検証
クラウドのAIサービスでマルチモーダル埋め込みを提供し、日本語に対応しているものとしては、Azureのマルチモーダル埋め込みが挙げられます。15 今回は補足として、ここまでと同じ検証をAzureのマルチモーダル埋め込みで検証します。
まずは検証に使用する画像データを埋め込み表現に変換しローカルのファイルに保存します。Azureのマルチモーダル埋め込みでは、siglipの時とは違い、検証に使用する画像データを埋め込み表現に変換したものはpickle形式のファイルで保存しています。また実装コードのファイル名はImage_register_azure.pyとしています。
Image_register_azure.py
import os, glob
from tqdm import tqdm
import requests
import numpy as np
import faiss
import pickle

os.environ["VISION_ENDPOINT"] = #Azure AI Servicesのendpointを記述してください
os.environ["VISION_API_KEY"] =  #Azure AI Servicesのapi keyを記述してください
vectors = []
endpoint = os.getenv("VISION_ENDPOINT") + "/computervision/retrieval:vectorizeImage?api-version=2024-02-01&model-version=2023-04-15"
headers = {
    "Content-Type": "application/octet-stream",  # リクエストボディは画像のバイナリデータ
    "Ocp-Apim-Subscription-Key": os.getenv("VISION_API_KEY")
}

# フォルダ内の画像ファイルのフルパス取得(サブフォルダ含む)
def get_image_paths(root_dir):
    # 画像ファイルの拡張子に基づくパターンを指定
    patterns = ['*.png', '*.jpg', '*.jpeg', '*.gif', '*.bmp']
    image_paths = []
    for pattern in patterns:
        # 指定したパターンでファイルを検索
        search_pattern = os.path.join(root_dir, '**', pattern)
        image_paths.extend(glob.glob(search_pattern, recursive=True))
    return image_paths
# フォルダ内の画像を全てprocessorでembeddingに変換
image_features = []
image_dir = 'recipe_img'
output_json_filepath = image_dir+'_azure.json'

image_paths = get_image_paths(image_dir)
for image in tqdm(image_paths, desc='Convert Embedding'):
    filename = os.path.basename(image)
    with open(image, mode="rb") as f:
        image_bin = f.read()
    try:
        response = requests.post(endpoint, headers=headers, data=image_bin)

        image_vec = np.array(response.json()["vector"], dtype="float32").reshape(1, -1)
        vectors.append(image_vec)
    except:
        vectors.append(None)
        print('error: ' + filename)
        continue
    with open(image_dir  + "/" + os.path.splitext(os.path.basename(image))[0]  + ".pkl", 'wb') as f:
                pickle.dump(image_vec, f)
dimension = 1024
index_flat_l2 = faiss.IndexFlatIP(dimension)

for vector in vectors:
    index_flat_l2.add(vector)

print(index_flat_l2.ntotal)
image_dir = 'recipe_img'
#画像ベクトル化の結果を保存
with open(image_dir +"_azure.pkl", "wb") as f:
    pickle.dump(index_flat_l2, f)
次にsiglip,siglip2と同じやり方で上位k位を1,3,5にして検証してみます。
検証用のコードは下記の通りとなります。ここで実装コードのファイル名はevaluation_azure.pyとしています。
evaluation_azure.py
import glob
import pandas as pd
import os
import glob
import json
import pandas as pd
import requests
import numpy as np
import pickle
import time

os.environ["VISION_ENDPOINT"] = #Azure AI Servicesのendpointを記述してください
os.environ["VISION_API_KEY"] = #Azure AI Servicesのapi keyを記述してください

endpoint = os.getenv("VISION_ENDPOINT") + "/computervision/retrieval:vectorizeImage?api-version=2024-02-01&model-version=2023-04-15"
headers = {
    "Content-Type": "application/octet-stream",  # リクエストボディは画像のバイナリデータ
    "Ocp-Apim-Subscription-Key": os.getenv("VISION_API_KEY")
}

image_path='recipe_img'
with open(image_path +"_azure.pkl", 'rb') as f:
    index_flat_l2 = pickle.load(f)


def search_faiss_by_text(query_text, n=3):
    endpoint = os.getenv("VISION_ENDPOINT") + "/computervision/retrieval:vectorizeText?api-version=2024-02-01&model-version=2023-04-15"
    headers = {
        "Content-Type": "application/json",
        "Ocp-Apim-Subscription-Key": os.getenv("VISION_API_KEY")
    }
    data = {
        "text": query_text
    }
    # Vectorize Text API を使ってクエリをベクトル化
    response = requests.post(endpoint, headers=headers, data=json.dumps(data))
    query_vector = np.array(response.json()["vector"], dtype="float32").reshape(1, -1)
    # Faiss 検索
    D, I = index_flat_l2.search(query_vector, n)
    return D, I

def azure_results(input_texts,k):
    D, I = search_faiss_by_text(input_texts, k)
    img_list=[]
    images_pkl = glob.glob(image_path +'/*.pkl')
    k=min(k,len(images_pkl))
    for i in range(k):
        img_list.append(image_path + "/" + os.path.splitext(os.path.basename(images_pkl[I[0][i]]))[0]+ ".jpg")

    return img_list

file_list=glob.glob("*/*.txt")
#検索キーワードをファイルから読み込む
with open('search_word.csv', 'r', encoding="shift-jis") as file:
    search_words = file.readlines()
    search_words = [search_word.strip() for search_word in search_words]  # 改行を削除


def evalution (search_words,k):

    search_word_list = []
    hit_word_list = []
    for word in search_words:
        result = azure_results(word,k)
        time.sleep(7)
        search_word_list.append(word)
        for r in result:
            correct = 0
            print("result",result)
            text =r.replace("jpg","txt")
            print(text)
            with open(text, mode='r') as f:
                recipe = f.read()
                if word in recipe:
                    correct = 1
                    break
                else:
                    correct = 0

        hit_word_list.append(correct)

    print(len(search_word_list))
    print(sum(hit_word_list))
    df = pd.DataFrame({"search_word":search_word_list,"hit_word":hit_word_list,"accuracy":sum(hit_word_list)/len(search_word_list)})
    #結果をcsvファイルに保存
    df.to_csv("azure_test_"+str(k)+".csv")
    return df

evalution (search_words,1)
evalution (search_words,3)
evalution (search_words,5)
結果を見てみると、siglipの方がAzureのマルチモーダル埋め込みより精度が高い結果になっています。

現状、キーワードによる画像検索では、siglip2やAzureのマルチモーダル埋め込みよりsiglipの方が一番有効そうです。
9.終わりに
本記事では、siglip, siglip2, Azureのマルチモーダル埋め込みについてレシピ画像を使って、キーワード検索がどのくらい精度で検索できるか検証を行いました。 検証の結果、日本語のキーワードで画像を検索するには、現状siglipが一番精度がいいという結果になりました。
今回は文章から画像を検索するタスクを行いましたが、次回はマルチモーダルAIを使って、与えられた画像から似たような画像を検索する類似画像検索に挑戦しようと思います。